The Tale of Tom's Creality K1 Max: A Repair Odyssey
In the vibrant landscape of 3D printing, the excitement of creating something from virtually nothing is often tempered by the technical challenges that can arise. This was vividly illustrated when Tom, a 3D printing enthusiast, brought his Creality K1 Max into our shop, burdened with a problem that would test the limits of our repair skills.
The Initial Complication
Tom's printer suffered from a common ailment in the world of 3D printing: a clogged nozzle. Attempting a bit of DIY maintenance, he endeavored to replace the nozzle himself. However, this seemingly straightforward task took a turn for the worse when he attempted to remove the screws securing the hotend from the bottom, damaging the screw slots in the process. This left the screws irremovably fixed, thwarting any further attempts to address the clog or replace the nozzle.
Our Approach
Upon receiving Tom's Creality K1 Max, our first order of business was to attempt what Tom could not—remove the stubborn screws. Despite our best efforts, expertise, and tools designed for such tasks, the screws remained immovable, their slots too damaged for any screwdriver to find purchase.
Faced with a repair that was quickly becoming a significant operation, we realized conventional methods wouldn't suffice. The decision was made to carefully use a saw to cut through the screws—a method fraught with risks, including potential damage to the printer's frame and the hotend itself. Yet, it was a necessary step to revive Tom's printer.
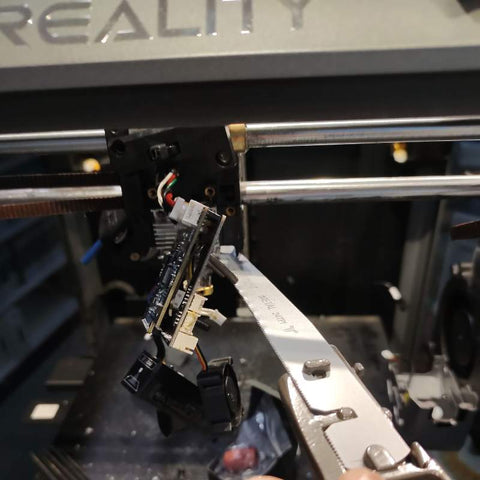
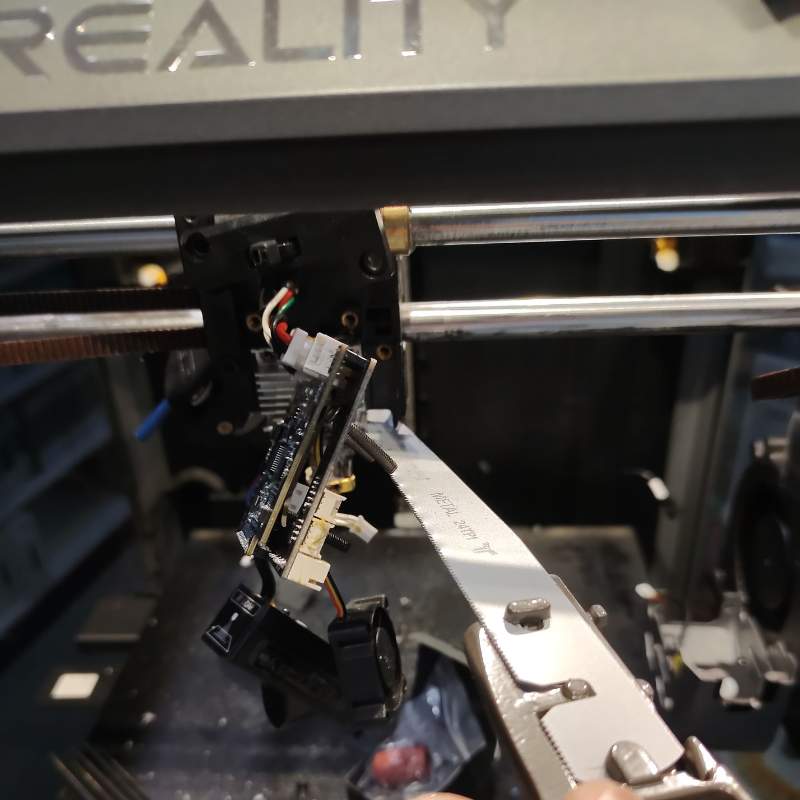
The Operation
The operation required a steady hand and a meticulous approach. Protective measures were taken to shield the printer's critical components from any metal shavings or collateral damage that could arise from our intervention. Then, with precision, we cut through the screws, liberating the hotend from its problematic confinement.
With the screws removed and the hotend finally accessible, we proceeded to replace the clogged nozzle. This was followed by a thorough cleaning of the hotend to ensure no remnants from the clogged filament or the operation itself would pose further issues.

Restoration and Testing
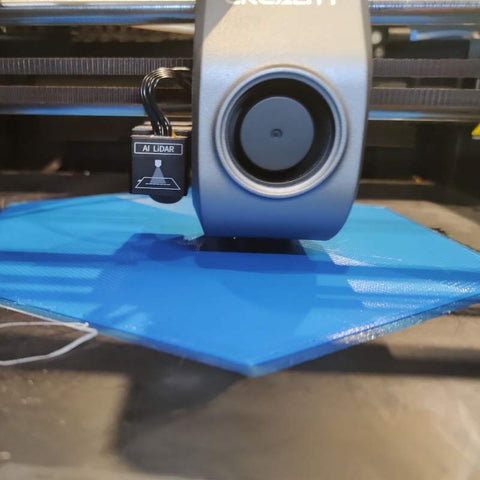
The reassembly of the Creality K1 Max was done with equal care, replacing the damaged screws with new ones, ensuring a secure and proper fit. The final steps involved leveling the print bed—an essential task for achieving optimal print quality and ensuring that the printer's calibration was back to its manufacturer standards.
The moment of truth came with the test print. We watched as the printer, once sidelined by a clogged nozzle and compounded by damaged screws, sprang back to life. It was a rewarding sight, seeing layer after layer laid down with precision, the machine operating as if it had never faced such dire circumstances.
The Conclusion
When Tom returned to collect his printer, his relief and gratitude were palpable. The Creality K1 Max, which had come to us in a state of disrepair, was now ready to return to service, its operation smooth and its prints flawless.
This repair journey was a testament to the complexities of maintaining 3D printers. It highlighted not just the technical challenges that can arise from what seem like minor issues but also the importance of professional intervention when DIY solutions fall short.
Tom's case serves as a valuable lesson to the 3D printing community: while the spirit of DIY is commendable, the intricacies of 3D printer repair often require specialized skills and tools. Moreover, it underscores the resilience of these remarkable machines, capable of being restored to their full potential with the right care and expertise.
In the end, Tom's satisfaction was a reminder of why we do what we do. There's a unique fulfillment in tackling such challenges head-on, restoring functionality to machines that inspire so much creativity and innovation.